Owner & setup
Owner setup
Pharmacy profile and settings, staff and roles, branches, receipts and printers, labels, importing data, backup and the audit log
For:OwnerManager
On this page
Before the first sale, the owner sets up the pharmacy details, staff accounts, branches and printers, and brings in old data. This chapter covers each step.
Pharmacy profile and settings
Open Admin › Settings. The top shows your Subscription (plan, expiry, branches and users).
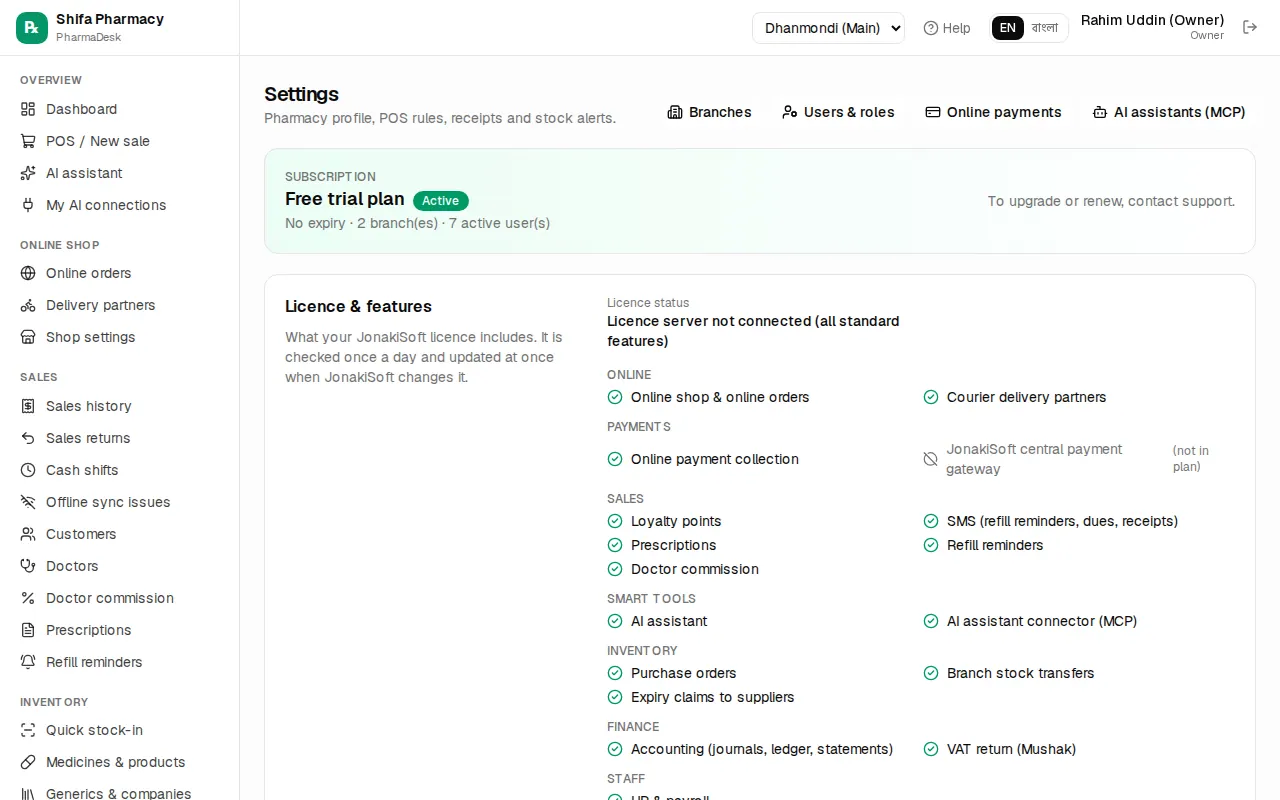
Pharmacy profile — printed on receipts, invoices and reports:
- Fill in Pharmacy name, Phone, Email, Address.
- Add Drug licence no., Trade licence, VAT registration (BIN).
- If you have a logo online, paste its web link into Logo URL.
- Press Save profile.
The sections below are saved together with the Save settings button:
- Sales & POS: VAT on taxable items (%) (only for products marked VAT applicable), Default discount (%), Cashier discount cap (%) (managers can go above it), Return window (days), and Round bills to whole Taka.
- Loyalty: Enable loyalty points, points per ৳100 spent, and the value of one point in Taka.
- Receipts: Paper size (80 mm thermal, 58 mm thermal or A4 invoice), the staff Default language, a Header line and Footer note (for example "Medicines can be returned within 7 days").
- Stock alerts & reminders: how many days before expiry to warn, refill reminders, the invoice-scanning mode for stock-in, the AI assistant on/off switch, and Send SMS.
- Staff leave: casual, sick and annual leave days per year.
Staff and roles
Admin › Users & roles lists everyone who can sign in. Each user has one role and, optionally, one branch.
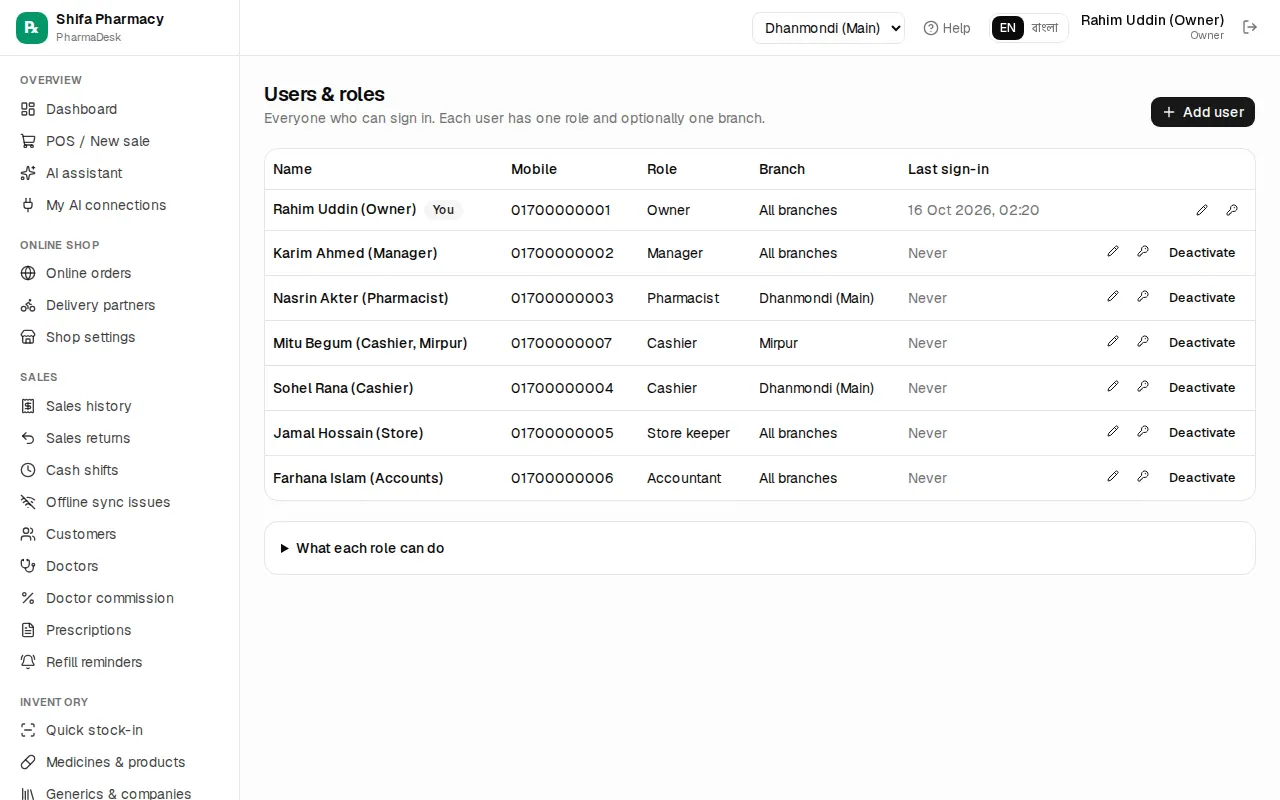
Adding a staff member:
- Press Add user.
- Enter Full name and Mobile (login) — they sign in with this number. Email is optional.
- Choose the Role.
- Choose the Branch. Leave it on "All branches" to let them switch between all branches; pick one to keep them in that branch.
- Set a Password of at least 6 characters.
- Press Save, then give the password to the staff member privately.
What the roles mean:
| Role | Can do |
|---|---|
| Owner | Everything, including settings and users |
| Manager | Almost everything except settings: void sales, larger discounts, change prices, stock, purchases, accounts, reports, HR, import, audit log |
| Pharmacist | Sales, returns, customers, doctors, prescriptions, the medicine list |
| Cashier | Sell at the POS, customers; discounts up to the cap |
| Store keeper | Stock-in, purchases, adjustments, transfers, stock counts |
| Accountant | Payments, expenses, accounting, reports, doctor commission |
For the full list, open What each role can do at the bottom of the page.
Editing, passwords and deactivating — at the right of each row:
- Pencil icon: change name, number, role or branch.
- Key icon: type a new password and press Set password. The user is signed out everywhere.
- Deactivate: use it when someone leaves. They are signed out at once and cannot sign in. Their past sales and records stay. Press Activate to bring them back.
Branches
Admin › Branches lists each branch with its number of users and batches in stock. Each branch has its own stock, cash drawer, sales and purchases.
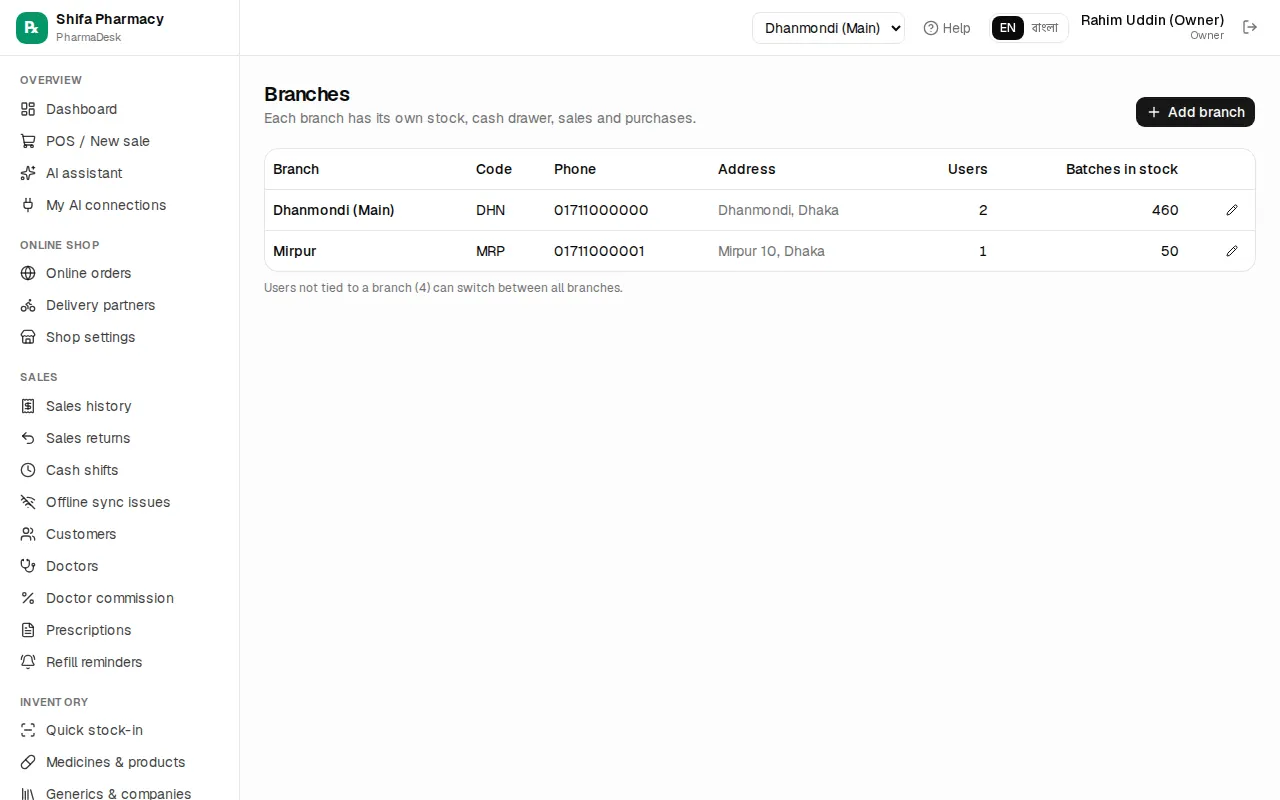
- Press Add branch.
- Enter the Branch name and a short Code (for example
DHN) — it appears on document numbers. - Add Phone and Address, then press Save.
To close a branch, open it with the pencil icon and untick Active; closed branches disappear from the branch switcher in the header.
Receipts and printers
Open Admin › Printers & labels.
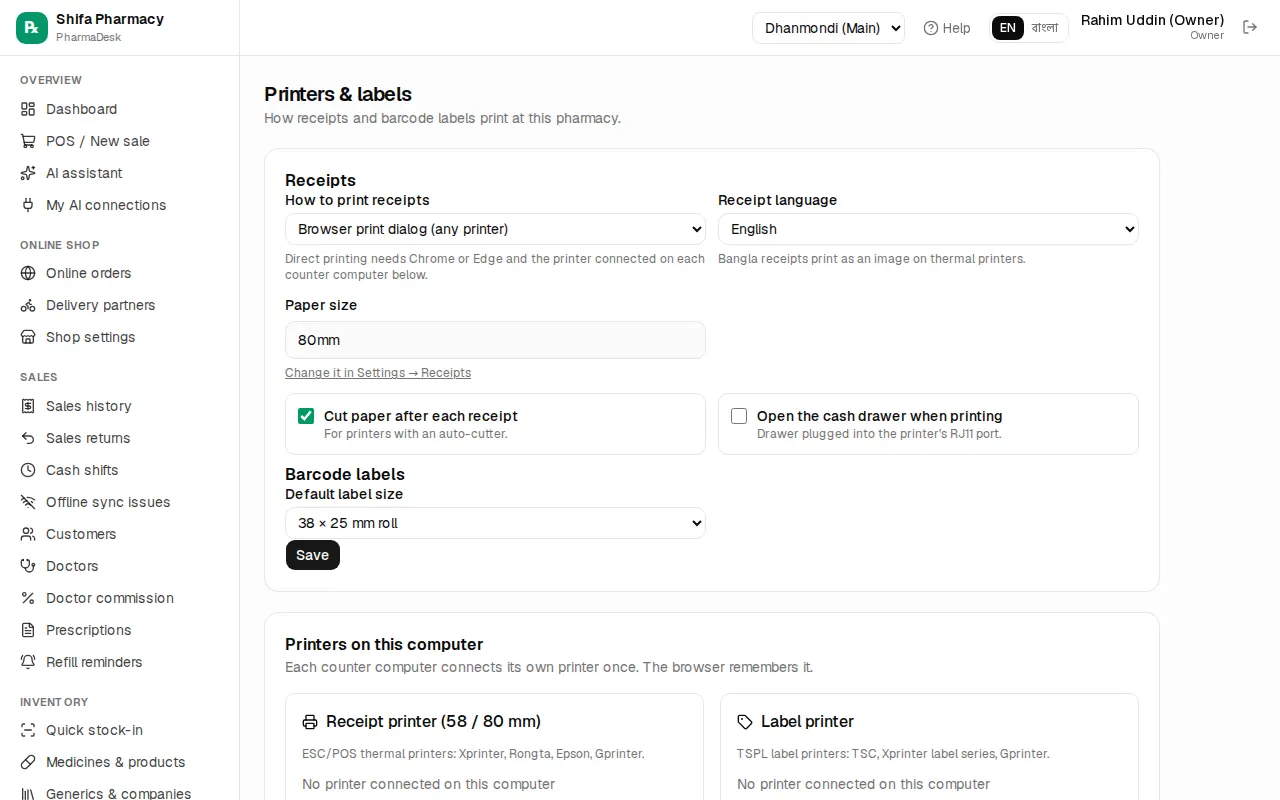
How to print receipts:
- Browser print dialog (any printer) — the simplest; shows the print box every time.
- Direct to thermal printer (no dialog) — faster; needs Chrome or Edge, and the printer connected once on each counter computer.
Also choose the Receipt language (Bangla receipts print as an image on thermal printers), Cut paper after each receipt, Open the cash drawer when printing, and the Default label size, then press Save. The paper size is changed in Settings › Receipts.
Connecting the printer on each counter (the Printers on this computer section):
- Open this page on the computer that will print.
- On the Receipt printer (58 / 80 mm) card press Connect USB printer or Connect serial / Bluetooth and pick the printer from the list.
- Press Test print; if you have a cash drawer, try Open drawer.
- For a label printer, connect it the same way on the Label printer card and press Test label.
Supported: ESC/POS receipt printers (Xprinter, Rongta, Epson, Gprinter) and TSPL label printers (TSC, Xprinter label series). The browser remembers the printer.
Shelf and barcode labels
On Inventory › Medicines & products press Labels (or Print labels on a purchase, which brings in every batch from that delivery).
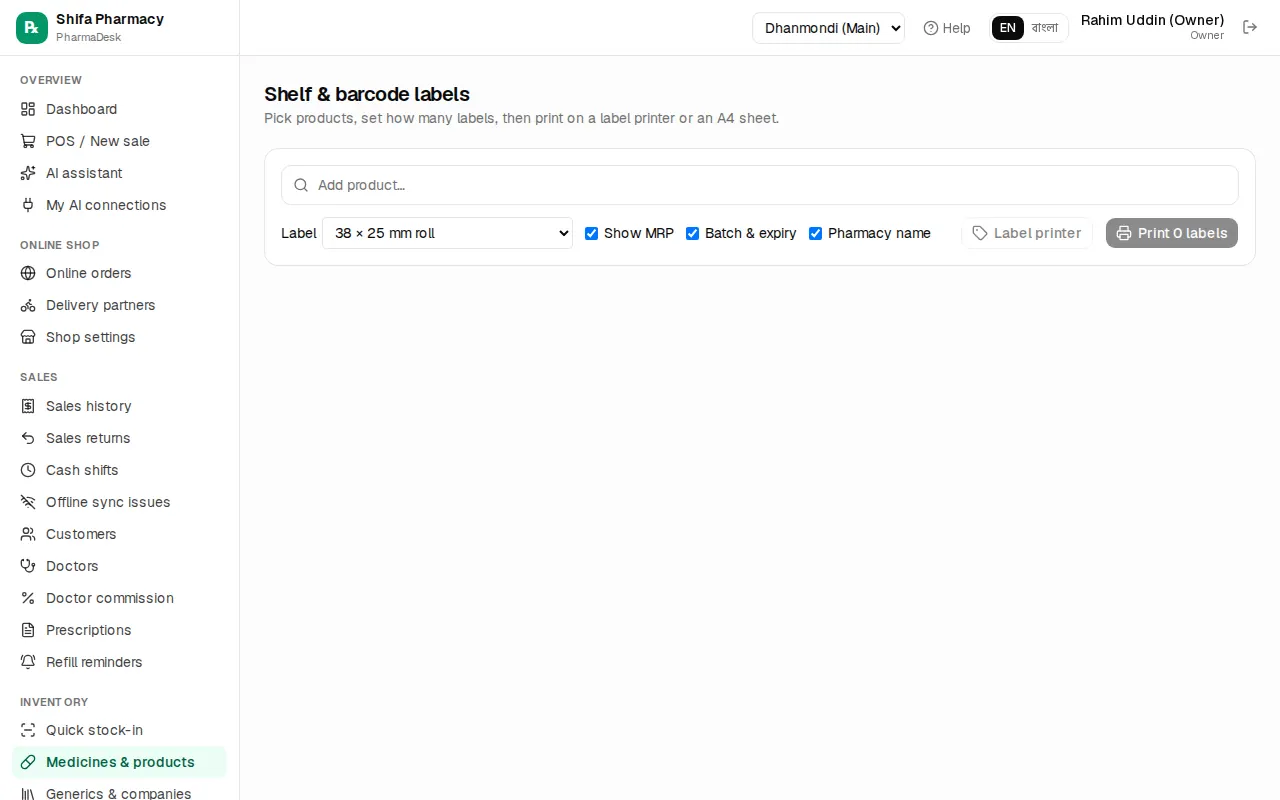
- Find medicines with Add product… and set the Copies for each.
- Pick the size under Label (roll or A4 sheet).
- Tick Show MRP, Batch & expiry and Pharmacy name as needed.
- If some products have no barcode, press Create barcodes for N.
- Press Label printer for roll labels, or Print N labels to print through the browser.
Importing old data
Admin › Import data brings medicines, stock, customers, suppliers and doctors in from an Excel or CSV file. Import in the numbered order: Medicines & products first, then Opening stock, then Customers & dues, Suppliers & payables, Doctors.
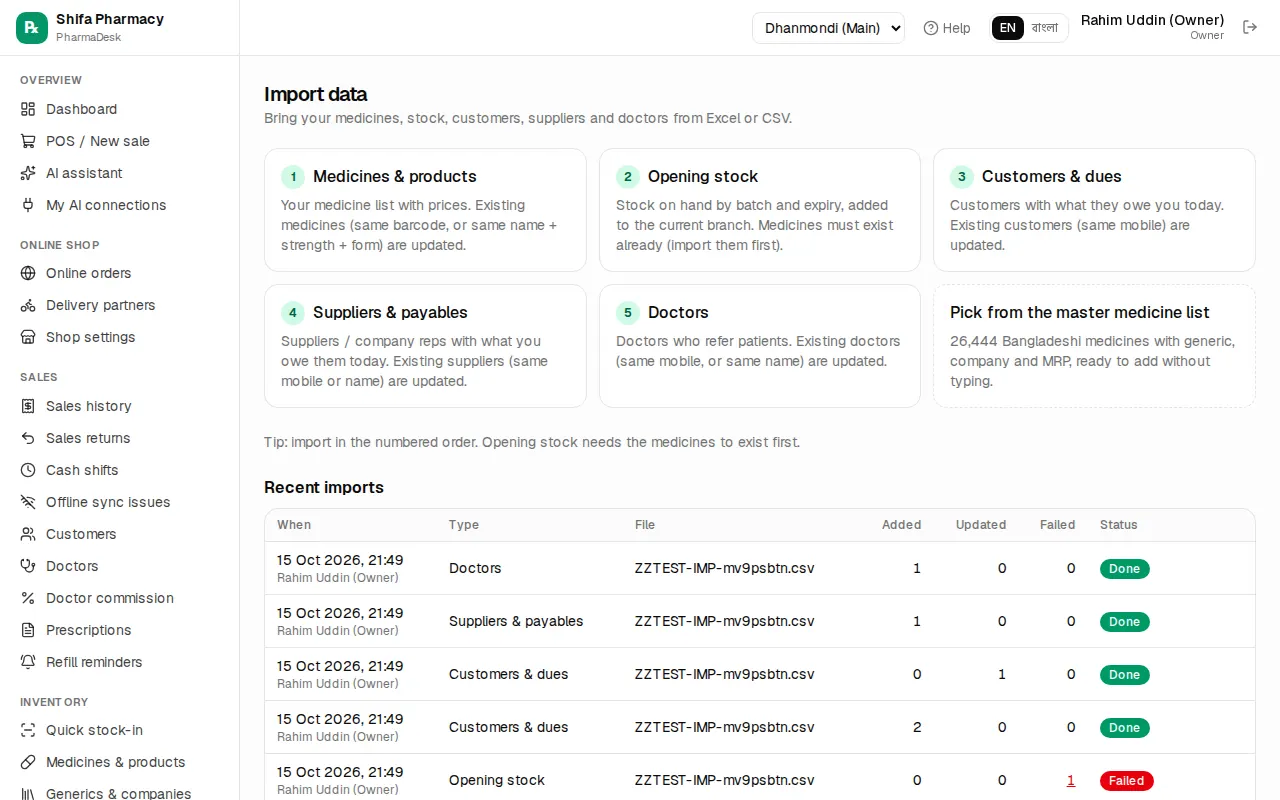
- Pick a type.
- Press Download sample file to see which columns are expected.
- Press Choose Excel or CSV file and pick your file.
- Under Match your columns, check each field is matched to the right column; set it to "Not in file" if you don't have it.
- Review the problems under Check before importing (Show only problems). Rows with errors are skipped.
- Press Import N rows. At the end you see how many were added, updated and failed; if any failed, use Download failed rows, fix them and import again.
Opening stock goes into the branch selected in the header, in units (tablets, bottles), not strips. The Pick from the master medicine list card adds medicines without typing.
Backup
The Backup & restore page exists only in the installed (on-prem) edition of PharmaDesk, and only the owner can open it, from the button at the top of Settings. The online (cloud) edition has no such page.
- Backups are made by the desktop app. First open the desktop app on the main computer and choose a backup folder.
- Back up now makes a backup within a minute. Use Download latest backup to keep a copy on a USB drive or in the cloud.
- To restore, close the app on all counters, then run Restore from the desktop app's menu on the main computer. Restoring replaces all current data with the backup.
- Export key records gives medicines, batches, customers and suppliers as a JSON file — it is not a full backup.
Audit log
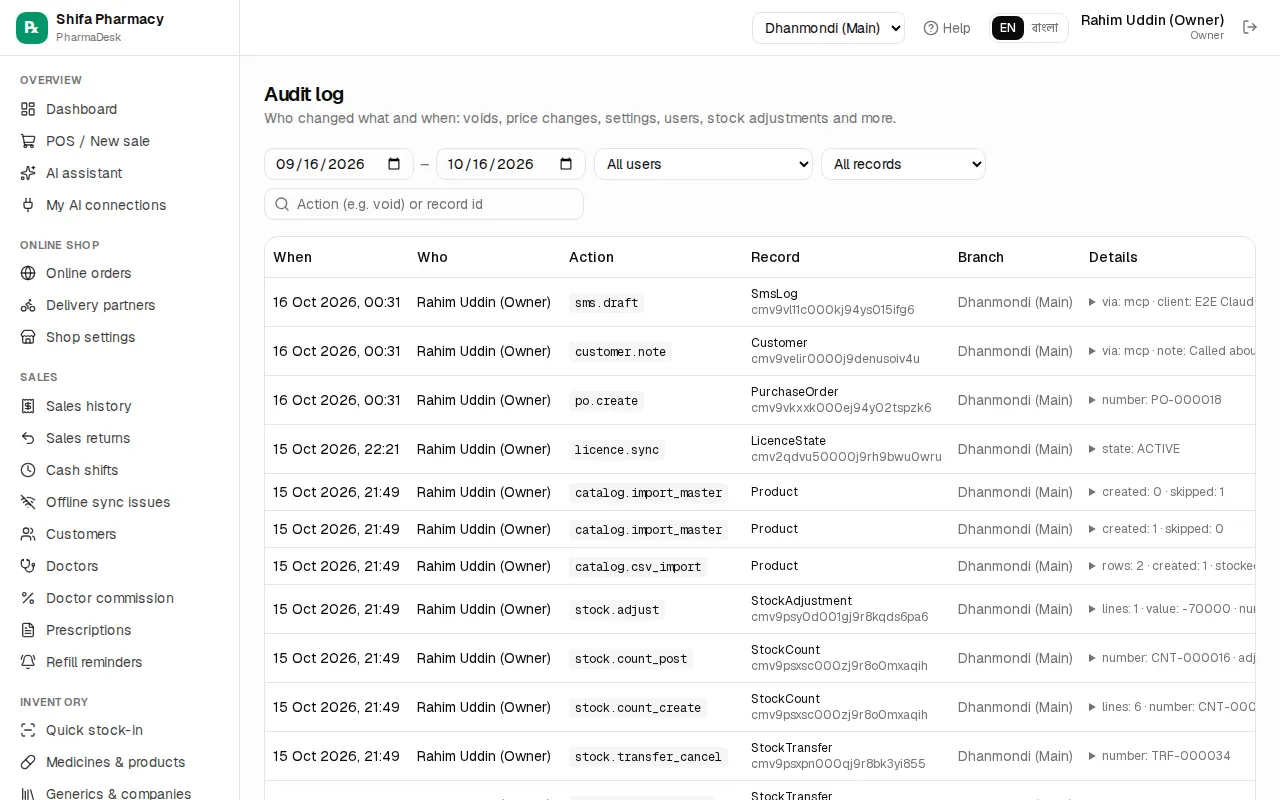
Admin › Audit log shows who changed what and when: voided sales, price changes, settings, users, stock adjustments and more. Filter by date range, All users, All records and the search box (for example void). The Details column shows the before and after values.
Common mistakes
- Making everyone an owner or manager. Give each person only the role they need.
- Not deactivating staff who leave. Do it the same day.
- Importing opening stock before medicines. Stock rows fail when the medicine doesn't exist yet.
- Entering stock in strips. Import quantities in units.
- Not connecting the printer on every counter. In direct-print mode each computer connects its own printer.